Category: Help Yourself Series

  • CLEANING OUT RAINWATER TANKS – A HEADS UP

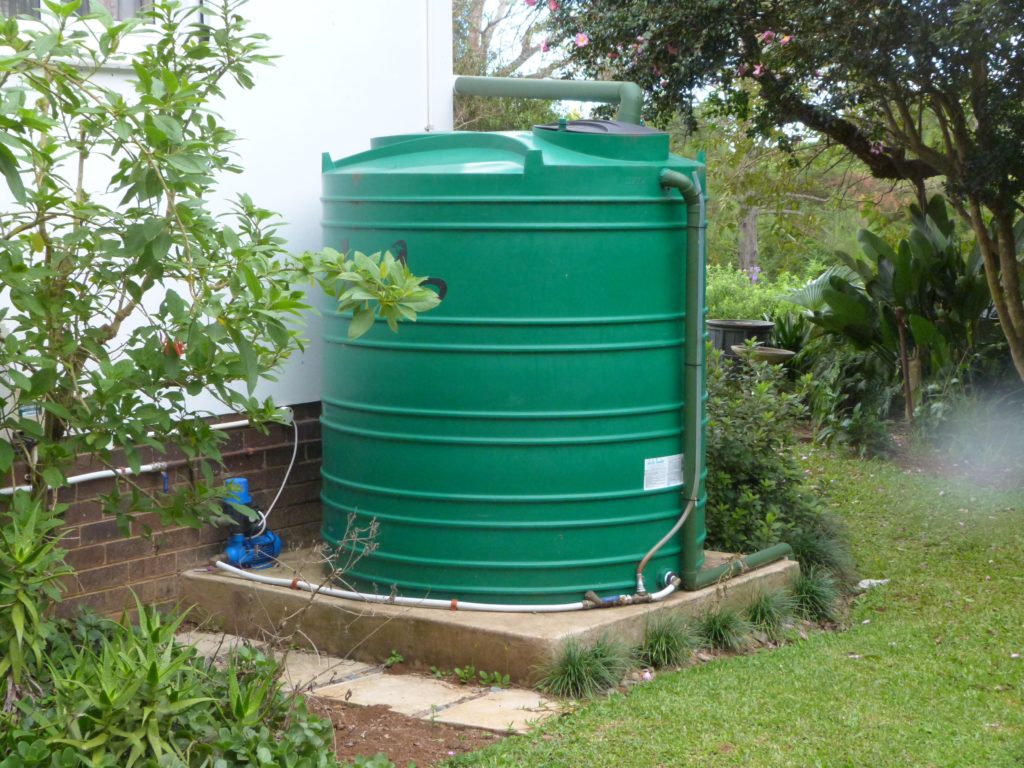
    Once the idea of installing rainwater tanks takes shape, things tend to move quite fast, in our experience. The enthusiasm of seeing the job moving is strong, particularly when the job is to be done during the rainy season when visual results come fast.

    One of the assumptions you need to make is that, over time, the rainwater in your water tank will get contaminated. The degree of contamination will depend upon the precautions you take to minimise contamination and the end use of the water.

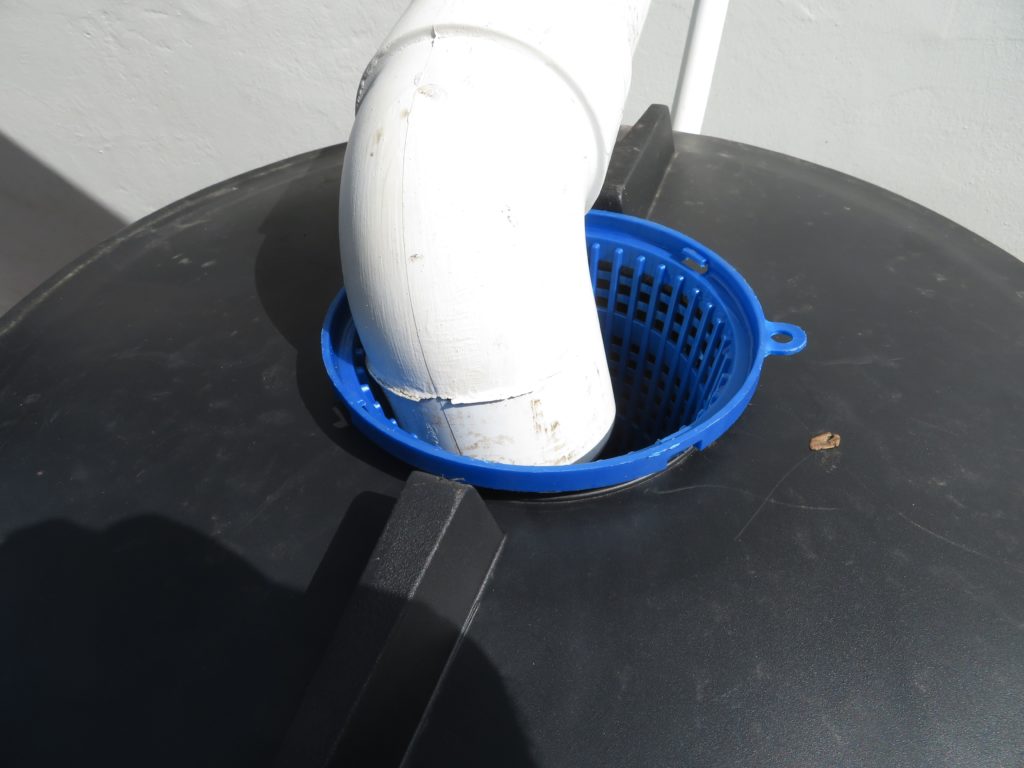
    Our conclusions have been that you should try and put as many controls on as possible, particularly relating to first flush diversion and filtering. Roofs are great attractors of dirt. This can be from the fine dust which forms the nuclei of the raindrops in the sky, through to the faecal matter from birds, monkeys and other creatures that move over the roof.

    Figure 1 – typical small scale water
    purification equipment

    If you plan to use the rainwater for potable purposes, you will need to install filters and purification equipment before the water is tapped for use, to avoid sickness and potential poisoning from the water. Advice on quality levels and minimum standards is available from most filtering and purification equipment suppliers. You can also verify this by checking water quality standards on-line in your respective areas.

    Irrespective of the amount of filtering and purification that you do, the chances are that there will be contamination in your rainwater tank, and you need to periodically schedule tank cleaning. Unless you are happy to lose the water in the tank, it is best to schedule the cleaning when rainwater tank levels are at their lowest. We found that 2 or 3 people were needed to manhandle the tanks, once they had been emptied. In addition, the various pipes need to be disconnected before the tank is moved from its position.

    Figure 2 – In situ – sediment from Tank 1 cleaning

    In our case, our oldest tank (Tank 1) had no filtration at all for several years and when we came to clean the tank, the task was both unpleasant and potentially hazardous. From a health and safety point of view, remember that a water tank is defined as a confined space and working in such a space needs special measures to ensure that the worker inside is not overcome through either lack of oxygen or build-up of carbon dioxide and other potentially hazardous gases such as methane.

    Figure 3 – Main sediment from Tank 2 cleaning

    We have included a number of photos to show you what the muck that came out of the tanks looked like. We were surprised to see how bad it looked. However, thinking through the decomposition processes that were occurring in the tank and the various materials that were getting in there (excreta, leaves, dust, rain (mild carbonic acid), wind-blown soil, to name but a few), a thick, dark brown, smelly, semi-solid mess could be expected.

    Figure 4 – First sediment emptied from Tank 2

    Tank 2 had a first flush system installed early on and had less contamination. Tank 3 had a first flush system installed at the same time that the tank itself was installed so there was less contamination when that tank was finally cleaned out.

    Putting someone into the tank to clean it out needs to be planned carefully. Firstly, ensure that the individual can get in and out of the manhole easily and practice, if necessary. Also practice how you would get that person out if he/she were overcome by fumes or semi-conscious. Make sure that there is someone (a “buddy”) outside the tank watching the individual inside, talking to him/her all the time the person is in the tank. In that way, if something untoward should happen, the person inside can be evacuated or told to get out before they are overcome.

    After we had cleaned our tanks the hard way, we became aware of a neat vacuum tank cleaner which is quite nifty and user feedback seems to be very good. It is difficult to suggest how frequently tank cleaning should be carried out. Plastic tank manufacturers recommend approximately every 2-3 years but much depends upon local circumstances, contamination levels and practicalities. Of course, if you install the vacuum tank cleaner, it will be cleaned out every time the tank overflows. If, however, your tank never gets to a point where it does overflow, you may have to “force” the overflow or clean the tank manually.

    Arend Hoogervorst

  • Keeping Rainwater Tanks Clean

    Water Tanks

    You have installed your rainwater tanks and you may have even connected them up with pumps to your toilets and are using rainwater for flushing purposes. So now you sit back, relax, and watch your water bill go down and do nothing further. Right? Wrong!

    Figure 1 – Tank 3 acting as a reserve for Tank 1

    Rainwater

    Think about where your rainwater comes from. Rain is formed in the atmosphere where moisture forms around minute particles of dust (nuclei) in the atmosphere, which then forms raindrops or other forms of precipitation. When the rain falls onto your roof, it moistens and wets the roof, drops off its dust nuclei, picks up dust from the atmosphere that has blown or settled on the roof, along with leaves, twigs and other detritus from the air. As the rain continues the volumes of water increases and this flows down your gutters and into your rainwater tanks. Thus, your rainwater is quite “dirty” and needs a certain degree of treatment, depending upon its final use.

    Roof and Users

    Remember your roof is also a “way station” for birds, monkeys (if you have them in your area) and other small mammals and creatures such as bats, mice, rats, and lizards. These all excrete solid and semi-solid waste which collect on the roof. On its way to your tanks the rainwater picks up all these materials and carries them into your water tanks, to a greater or lesser degree. (more about that below.)

    Gutters

    An important preventative measure is to carry out regular maintenance on your gutters. That means cleaning them of muck, debris, leaves and twigs. This will reduce the volumes of detritus travelling to your first flush units and filters and lower the workload of cleaning them out.

    Rainwater for drinking?

    For those of you that use rainwater for drinking purposes, it is critical that you ensure that you filter, decontaminate, and disinfect the rainwater to a drinking water standard. You should get advice from experts on minimum standards and equipment required to prevent health and disease problems. (This will be dealt with separately.)

    First Flush Units

    Figure 2 – First flush unit on Tank 1

    The first line of defence is to ensure that your drainpipes leading into the tanks are fitted with first flush units. The principle behind these is that the first flush of rainfall on the roof will carry with it, an initial load of dust, excreta, leaves and the like, diverting 10-30 litre (depending upon how low the unit is from the drain pipe). Once the first flush unit has filled up, the subsequent, cleaner rainwater will carry on to the feed pipe and into the rainwater tank. 

    Filters

    As a further protection, consider adding swimming pool filter baskets to the inflow into the tank to collect larger debris such as leaves, which flow past the first flush. Some rainwater tanks are now fitted with mesh filters over the tank filling hole to catch smaller particles from entering the tank.

    Figure 3 – Example of swimming pool filter basket protecting tank inflows

    Cleaning Filters and First Flush Units

    First flush units should be emptied after every rain storm. They should also be thoroughly cleaned periodically as materials can build up inside the filters and pose a health hazard. During the rainy season when storms might occur more frequently, say more than once or twice per week, you will notice that there is less material collected in the filter because the roof and gutters become “cleaner”. That, of course, doesn’t mean that they are uncontaminated. There will still be impurities and pollutants in the water.

    Health and Safety

    Take care when working with, and cleaning gutters, the filters and first flush units. Protect yourself using rubber gloves (and, where necessary) dust masks. Animal excreta contains germs and contaminants which can be a danger to health. Remember that the nuclei (core) of raindrops are minute particles which can get into your lungs and cause damage.

    Afterthought

    Experience has shown that once you have established your rainwater collection and storage system, it makes sense to establish some form of system to keep it maintained and clean. This can be as simple as a checklist system, either linked to a calendar or electronic reminder system or a formalised “procedure” listing all the tasks that need to be carried out and a schedule dictating when they must be done. If you look after your systems and maintain them regularly, they will give you decades of good service and save you a fortune.

    Figure 4 – First heavy solids coming out of Tank 2

    The accompanying photo shows what comes out of a tank that has little or no filtration or separation of gutter and roof waste. The process of emptying and cleaning out rainwater tanks can be a dirty and potentially hazardous job which will be the subject of a separate article.

    Arend Hoogervorst              

  • Rain Water Tank and Supply System – Case Study

    Background

    Although there are only two of us in the house, a few years ago, we found that our potable water consumption numbers were creeping up significantly. Combining our various water uses (drinking, cooking, washing up, showering, toilet flushing, laundry, gardening, car washing and sundry cleaning), we found that we were using approximately 12 kilolitres (12,000 litres) of potable, treated water per month.

    Analysis – Disposal

    Figure 1 – rainwater tank (Tank 3), pump in-line filter, and level
    indicator (bottom R)

    We took a good look at the situation and decided that toilet flushing, laundry, cleaning and car washing was taking over half (+/- 6 kilolitres) of our consumption per month. We decided that although we were on a septic tank system (two tanks on ether side of the house with their own dedicated French drain systems draining into the one acre sloping garden property), we could not, in the short to medium term, re-align to a waterless dry flush toilet system. We also decided that we would not design a new grey water management system, preferring to continue to drain grey water to the septic tank system.

    Analysis – Non-Potable Water

    A review of the house (4 bedrooms, 3 bathrooms and a 2 room, home office arrangement) suggested that we had sufficient roof area (+/- 250 M2,) for rainwater harvesting  although only part of the roof area was covered by gutters connected to the tanks. We have a distinct wet and dry season (the months of September – March and April – August, respectively) and there are occasional storms in between the seasons to “top up” the tanks. This ensures that our tank capacity can last from one wet season to the next, thus avoiding the need to fall back on piped, potable, water supply when the tanks are empty. We are also located on high ground in a “mist belt” area so our incidence of rain and “cloud moisture” is higher and therefore creating greater likelihood of additional precipitation.

    Final Tank and Pump Configuration

    Figure 2 – Tank 2 pump, in-line filter
    and tap to right of tank. First flush
    unit obscured

    The final rainwater tank and supporting infrastructure in our installation series was installed recently so we have our final configuration. Tank 1 (2,500 litres) is located at the front of the house, fed from the front main roof, and pumps rainwater to the two flush toilets located in the house and to a yard tap for garden and car washing purposes. (There are switching valves which allow the system to be switched back to potable mains water supply if the tanks should run dry.) Tank 1 is linked to another 2,200 litre tank (Tank 3), fed from the roof at the rear of the house. Tank 3 is linked to Tank 1 by a pump system so that Tank 3 can top up Tank 1, as its level drops.

    Figure 3 – Tank 1 with first flush unit
    on the right

    Tank 2 (2,500 litres) is located in the kitchen yard at the back of the house and can top up tank 4 (950 litres) and supplies a yard tap for cleaning and garden use. It is supplied by rainwater from the side roof over the kitchen and dining room area. A pump tops up Tank 4 (which supplies the outside toilet and the office toilet).

    Rainwater Quality

    As the rainwater was not required for potable or semi-potable purposes, the

    Figure 4 – pipe connection showing level indicator,
    in-line filter, and valve (L to R) on Tank 2

    main means of “cleaning” the rainwater was through the use of first flush systems and filters. First flush units were installed on the three main tanks (Tanks 1, 2 and 3). Tank 4, the smaller tank, uses a swimming pool basket filter for large debris and a fine grid filter to reduce particles going into the tank. All rainwater pipes between the tanks and pumps, have a fine mesh filter to prevent particulate damage to the pumps and reduce the quantities of particles getting into the pipes and cisterns of the flush toilets.

    Figure 5 – fine mesh filter for
    rainwater tank (Tank 4)

    Conclusions

    Our potable water consumption has gone down from 12 Kilolitres (12,000 litres) per month to approximately 5 kilolitres (5,000 litres) for the two of us and that includes clothes washing, showering, cooking, and drinking. We believe that under drought stress conditions, and applying conservation practices, we could reduce this further to a maximum of 3.1 kilolitres (3,100 litres) per month.

    It is possible that we could link the washing machine to the rainwater system, but we feel that this would require additional filtering and cleansing techniques. That, however, is a project which will have to wait until other current priorities are dealt with!

    Arend Hoogervorst  

    Figure 6 – swimming pool basket filter
    used to catch large debris on Tank 3
    and Tank 4

  • Going Off the Grid – How Practical Is It?

    “Going off the Grid”, means, broadly, living without using the services of public or private utility companies (grids) such as electric, gas, or water, by generating and providing for one’s needs such as by using solar power, rainwater, growing your own vegetables, and composting your own waste.

    Photo by Alex Bierwagen on Unsplash

    “Going off the Grid” completely, for most people, is a completely unrealistic dream. The starting point must be to examine all the various aspects involved, review one’s lifestyle, resources, income and time availability and decide what is possible and practical and what may only be a longer-term goal.

    We, as a small family, started with the idea of “going off the Grid” because of intense frustration with ESKOM, the monopoly national electricity supply company. A few years ago, ESKOM. through poor long-term planning and political interference, had begun to introduce rotational “load shedding”, a euphemism for 2 hourly power cuts at the most inconvenient times of the day and night.

    The actual start of our “going off the Grid” journey had begun a few years earlier when we made a decision (before it was fashionable and ESKOM gave subsidies) to switch to using a solar geyser to provide our hot water. It was outrageously expensive, the return on investment was off the graph scale and it was my little experiment to see if it really could be of value. I will not go into detail here but leave that to a later article.

    Back to “Going off the Grid”. It only took some basic research to discover that if we truly wanted to go, electrically, off the Grid fully, i.e. disconnect from the municipal electricity supply, not only would we have to cover the entire roof, gutter to ridge (impractical) with solar panels, we would also have to completely cover our one acre garden with solar panels and put in place a battery system that would need licensing as a Hazardous Installation in terms of Health and Safety regulations.

    We subsequently had to go back to the drawing board and quantify what we wanted. To cut a long story short, after carrying out a rudimentary energy audit, we realised we had to lower our sights from fully off the Grid. The lesson for all initiatives is that one needs to assess the current situation, measure existing consumption and usage and then set achievable and affordable targets in the different areas.

    Each one of the detailed articles will describe what we did and how we arrived at the strategy, for example, in the case of alternative electricity supply, i.e. electricity, we discovered that our roof space, space for battery storage capacity and budget could allow us to generate approximately 50% of our monthly electricity bill. Results have shown that the savings figure varies, according to the season, between 50 and 65% of total consumption.   

    The topics that we will be covering in the various articles include: –

    • Electricity
    • Solar Geysers
    • Water
    • Gas
    • Solid Waste
    • Human Waste
    • Composting
    • Veggie Gardens

    We will end the series with an article discussing the lessons we learnt and, in particular, some of the learnings you will NOT get from the equipment salesmen. We will also discuss the lifestyle changes you will have to consider when you decide to go, even partially, “off the Grid”.

    We would welcome any feedback you would like to make and would be happy to add any additional articles on related topics that are relevant to the series.

    Arend Hoogervorst

Categories

Conferences & Seminars

Upcoming Events